
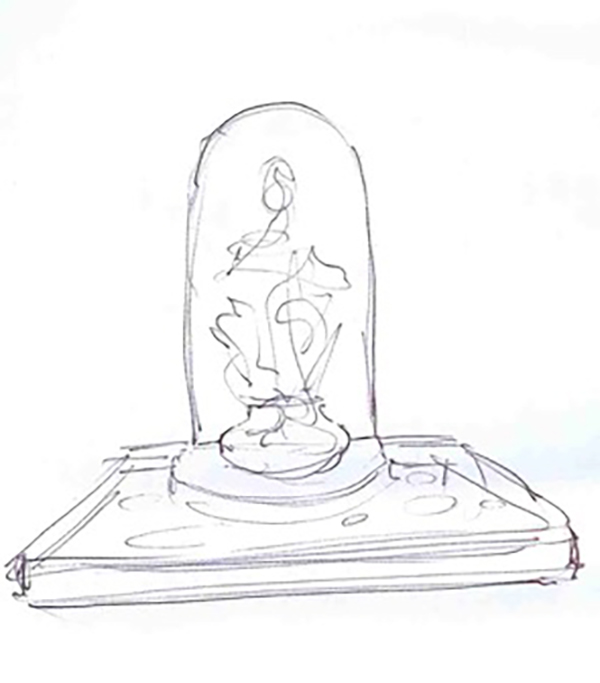
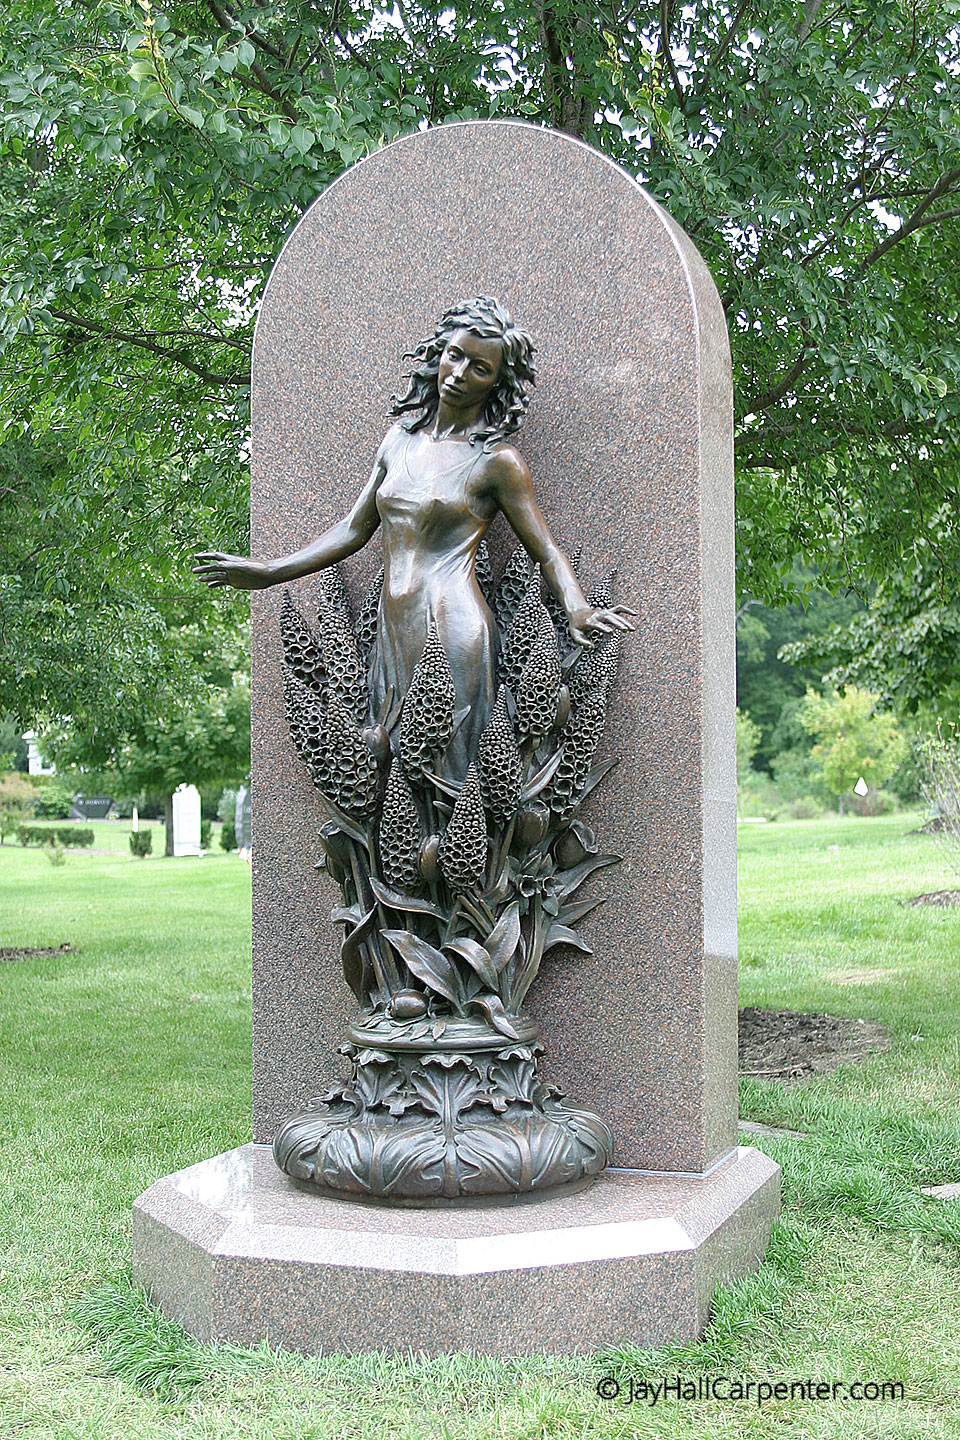
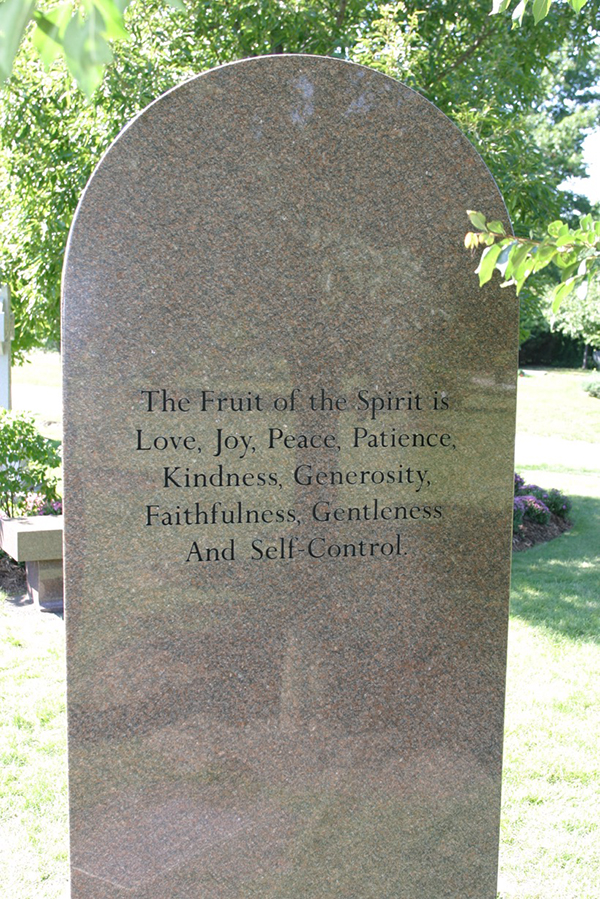
DESIGN
It all begins with an idea. It can be as basic as “We need something here,” and then sculptor and client go about discovering what that something might be. To illustrate, I will use a project from 2007 called the Gentile Memorial. The client’s parents had recently passed and she wanted to have a sculptural family marker made for Lake View Cemetery, in Cleveland, OH.
She told me about her family and we visited the site. We discussed materials and looked at samples and previous projects together. I began to formulate some approaches we might consider. One was very abstract (she had not wanted a portrait). One involved and angel (she decided against anything religious), and the third was an early version of the finished monument.
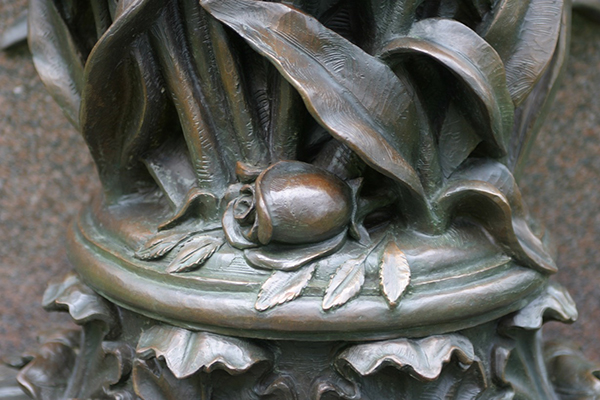
The memorial alludes to her grandfather’s career as a classical architect. We visited some of his Cleveland buildings, and the foliage is based on his work. The figure, while not a portrait, represents her mother’s welcoming spirit.
SCULPTING
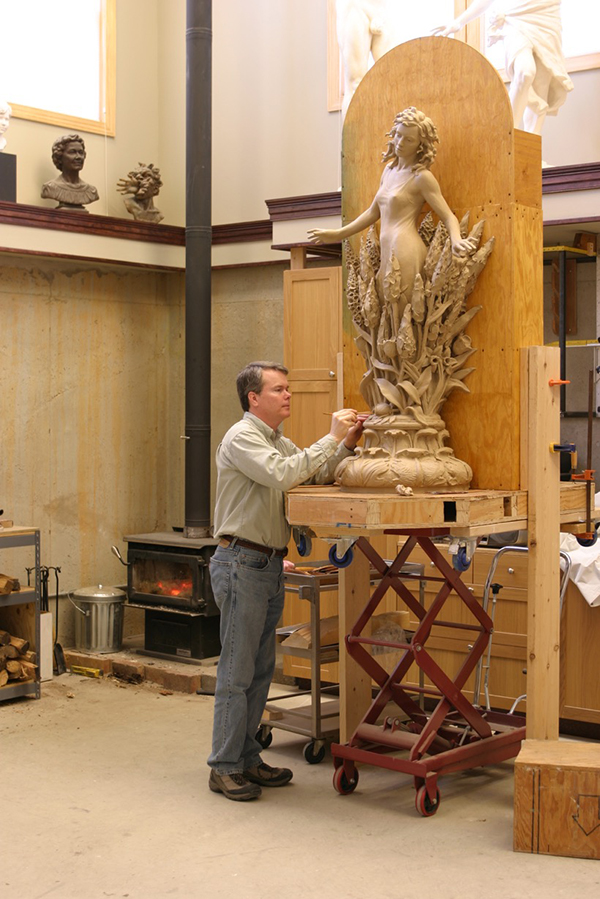
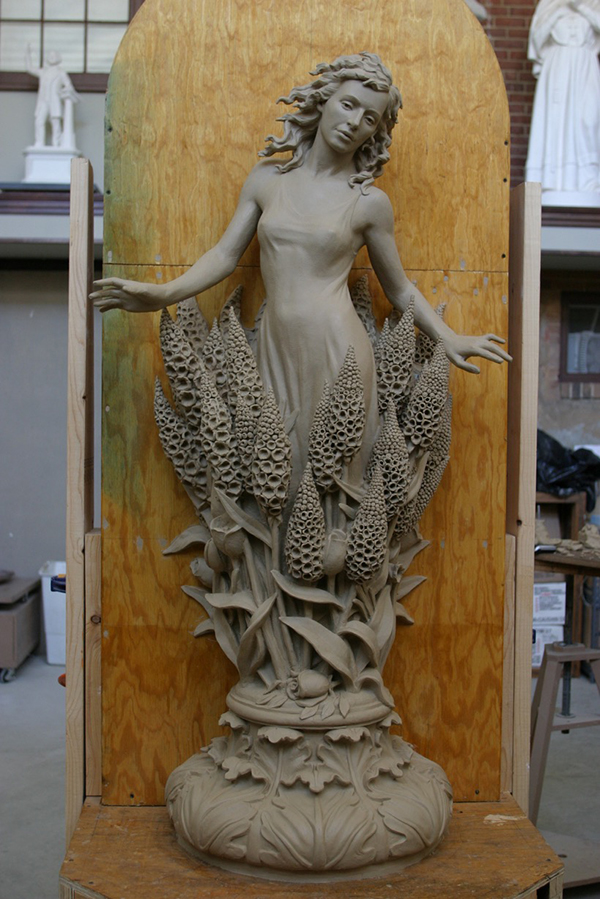
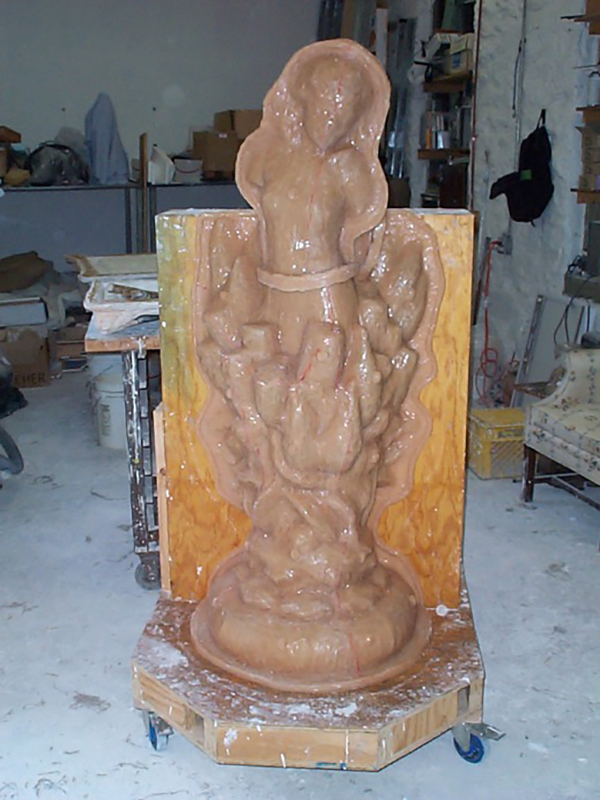
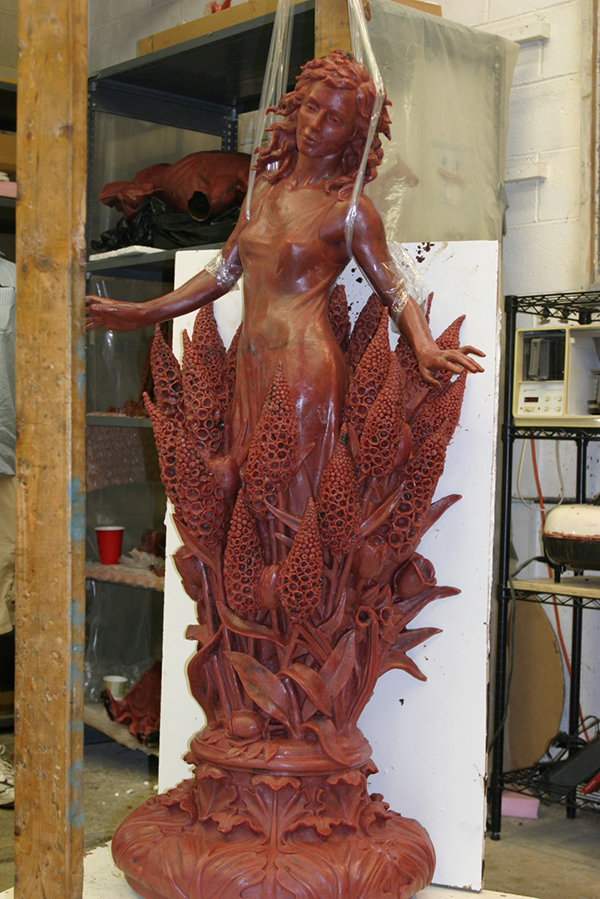
Because this project was fairly small, requiring a 5’ tall clay model, I began working full-size right away. On larger projects, I now sculpt a half-scale model first, to facilitate the enlargement process. I worked with several life models until I found the perfect one, and the clay work proceeded well. The client made several studio visits and the model developed further through our conversations.

FABRICATION
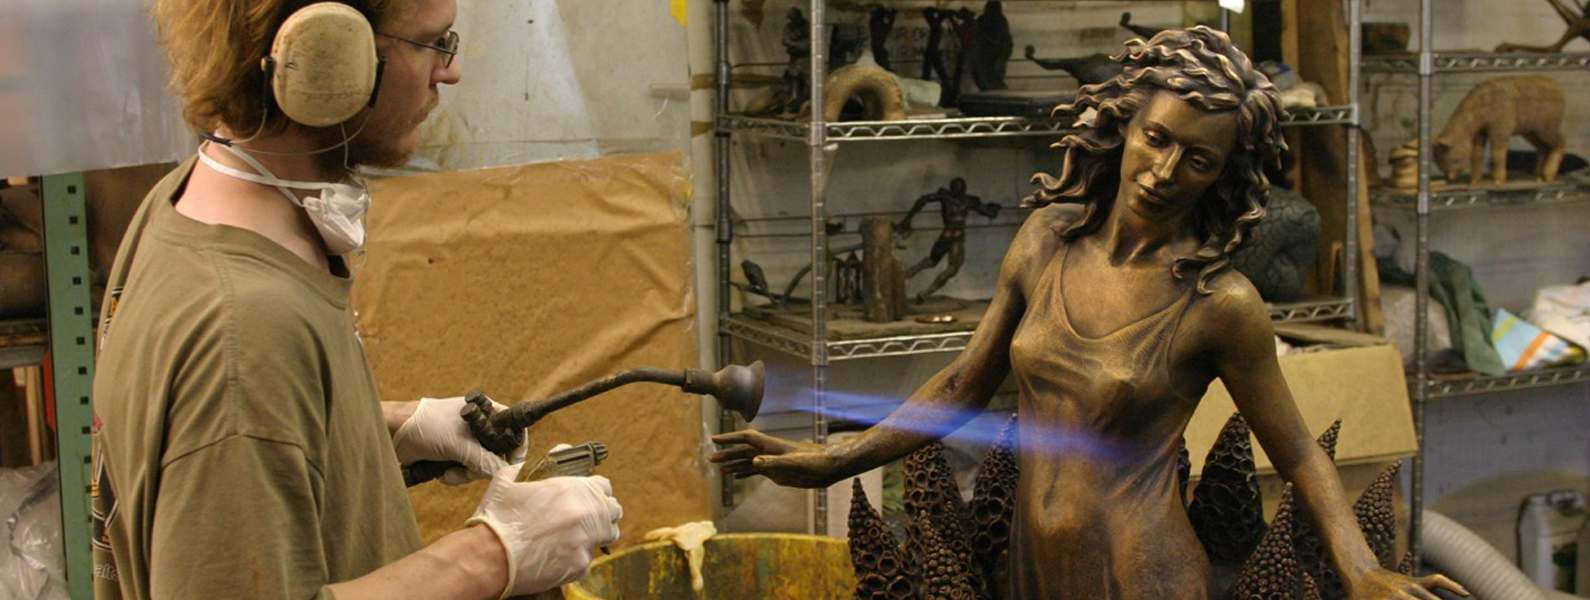
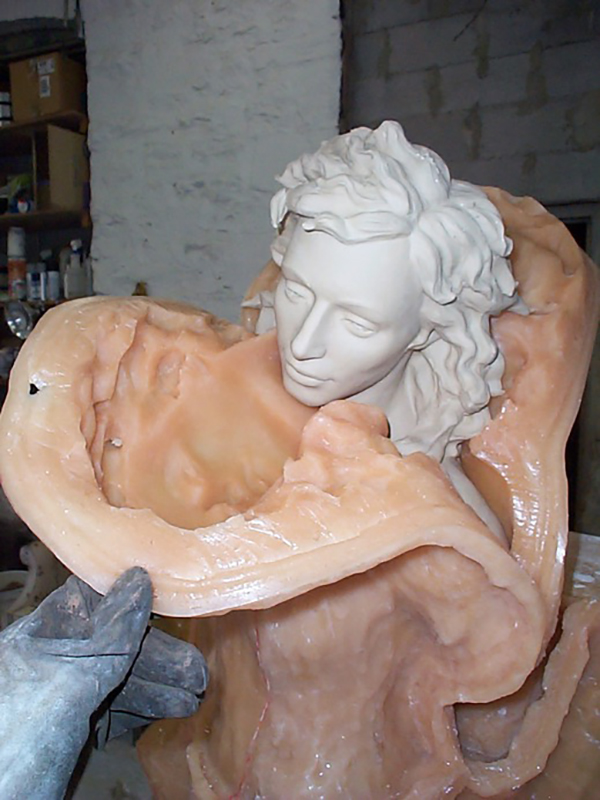
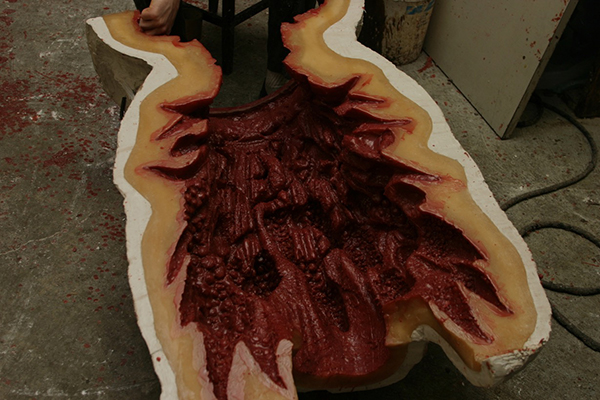
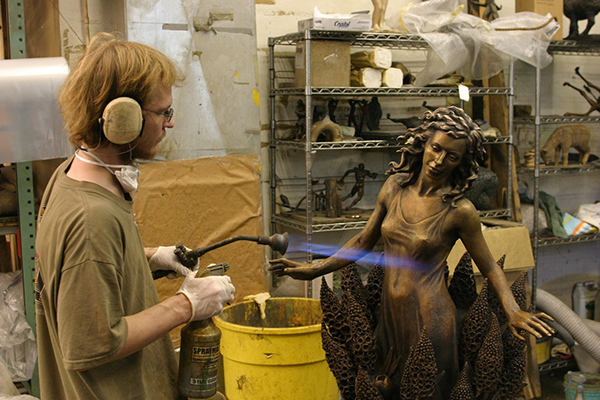
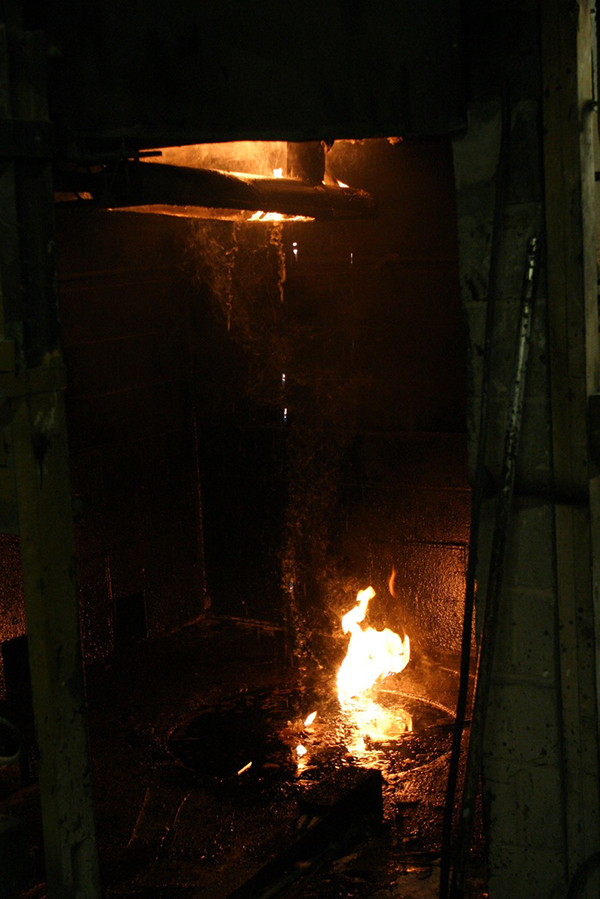
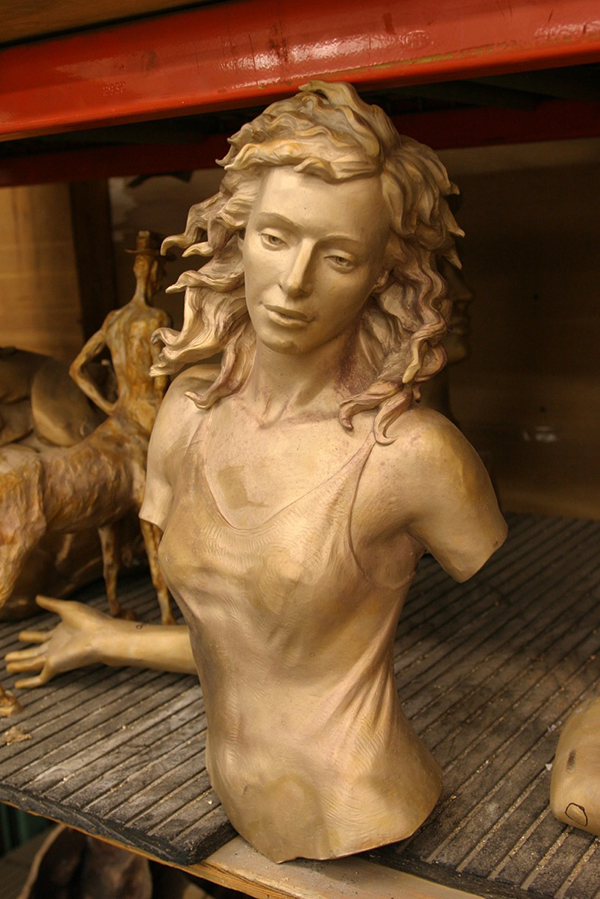
The clay model was delivered to the mold-maker and making the mold required about 1 week. The foundry received the mold and made a wax cast. The wax was refined and approved and cut into sections. Then a ceramic mold was made over it. The ceramic mold was fired in a furnace and the wax melted out. Molten bronze at 2100° F was poured into the cavity left by the wax, and allowed to cool. The bronze sections were broken out of the molds, refined and welded together. The welds were ground smooth. The finished cast was patinated by David Showalter by heating the bronze and applying chemicals to achieve its particular colors. The foundry process was about 4 months.
A rosy colored granite was ordered and inscribed by sandblasting through a template. The necessary mounting holes were predrilled. Individual marking stones were also designed and carved from the same color of granite.
INSTALLATION
On site, the granite was mortared to the foundation. Epoxy and stainless steel rods were used to attach the two slabs together. Likewise the bronze was mounted to the granite using epoxy and stainless steel.
DEDICATION
The sculpture was veiled for the dedication. A string quartet and two vocalists performed, and a benediction was offered by the clergy. The success of this project led to two additional projects and some lasting friendships.